Introduction
Recently Google introduced the beta program for Google Cloud Run. This is a service to run stateless containers on a fully managed environment by Google. It is essentially serverless for any container, scaling your containers up and down as requests (and peaks) come and go. The benefit of using tools like Cloud Run is that it abstracts away all the infrastructure, thus you can focus more on what really matters, building your application.
The reason why I'm so excited is because it essentially allows me to run my (already) dockerized applications in a serverless manner, reducing costs and maintenance burdens. You can turn any dockerized application into a serverless application using Cloud Run and in this post we are going to explore this with Go.
Setting up
Requirements
- You need an Google Cloud Platform account, you can create one here
- You need to enable billing on your Google Cloud Project to use Cloud Run see this
- You need to install gcloud sdk locally and make sure that you are logged in, see the guide
With everything set up in terms of account configuration we can enable Cloud Run in the GCP console. In the console head over to the menu on the left and press Cloud Run. This will move you to a page where you can enable Cloud Run for your current project (see picture below). After pressing the enable button Cloud Run will be available for your current project.
Since cloud run is still in beta we need to install the beta components in the gcloud utility and set the gcloud region to one of the available regions for Cloud run:
Enable cloud run in the gcloud utility
gcloud components install betaSet the region to one of the available regions:
- europe-west1
- us-central1
- us-east1
- asia-northeast1
Executing the following command will set your default Cloud run region, this can be overridden with the --region flag
$ gcloud config set run/region <REGION>Building the application
With that out of the way we can actually start building the application. We will be building an application which generates a random avatar based on the input you give it. We will be using the code from my previous post and turn it in a serverless API, to generate identicons (avatars) on the fly.
I've adjusted the code from my previous post to be used as a library, this way we can use it for a cli and for the web application we are building right now. You can find the code here
Let's start writing some code for the web version!
import (
	"github.com/barthr/identicon"
)

func main() {
  http.HandlerFunc("/identicon/generate", func(w http.ResponseWriter, r *http.Request) {
    name := r.URL.Query().Get("name")
    if name == "" {
      http.Error(w, "no name given", http.StatusPreconditionFailed)
      return
    }
    log.Printf("generating identicon for %s", name)

    w.Header().Set("Content-Type", "image/png")
    if err := identicon.Generate([]byte(name)).WriteImage(w); err != nil {
      http.Error(w, "failed generating identicon", http.StatusInternalServerError)
    }
  })
  http.ListenAndServe(":"+os.Getenv("PORT"), nil)
}
We can run the code locally by running the following command PORT=8080 go run main.go
This is everything needed to run a simple web application on cloud run. First we register a http handler which expects some input. After this input is considered "valid" we call our identicon library which will return a Identicon struct.
On the identicon struct there is a method WriteImage(w io.Writer) error, by using a io.Writer here as input we can easily change where the image is written to, in this case the http.ResponseWriter is used but in case of the cli version the image can be written to an os.File or anything which implements the io.Writer interface.
We are now ready to deploy this to cloud run. Cloud run requires that your code is bundled in a docker container and is able to serve http requests on a port configurable with the PORT environment variable.
Lets create a Dockerfile, I'll be using multistage builds so that the end container only contains the executable binary, I wont go in depth on how the Dockerfile and multistage builds work, if you want to learn more about this have a look at this link.
FROM golang:1.13 as builder
# Create and change to the app directory.
WORKDIR /app
# Retrieve application dependencies.
COPY go.* ./
RUN go mod download
# Copy local code to the container image.
COPY . ./
# Build the binary.
RUN CGO_ENABLED=0 GOOS=linux go build -mod=readonly -v -o server cmd/api/main.go
FROM alpine:3
RUN apk add --no-cache ca-certificates
# Copy the binary to the production image from the builder stage.
COPY /app/server /server
# Run the web service on container startup.
CMD ["/server"]With that out of the way we can submit a build to Google cloud build. Google cloud build will build our container and store it in cloud registry.
Execute the following command to publish a build to google cloud build
$ gcloud builds submit --tag gcr.io/<PROJECT_ID>/identicon-generatorIf cloud build successfully builds the container it will be published to the Google container registry. We can use the image in the registry to submit a deploy to Cloud run. There are multiple ways to do it but I'll be using the terminal to deploy the container to cloud run.
Execute the following command to publish a deploy to cloud run
$ gcloud beta run deploy --image gcr.io/<PROJECT_ID>/identicon-generator --platform managedThere are a few things going on here. First we tell gcloud that we want to use the managed platform using the --platform flag, it is possible to install Cloud run on your own Kubernetes cluster but that is out of scope of this article. Next we define what image we want to deploy, we point this to the image just published by cloud build, by default it will fetch the latest version of this image but it is also possible to deploy a specific version by adding a tag.
The command will prompt us with a question if we want allow unauthenticated requests, we input yes and now our cloud run function will be publicly exposed.
You can view your cloud run functions in the Google cloud run dashboard
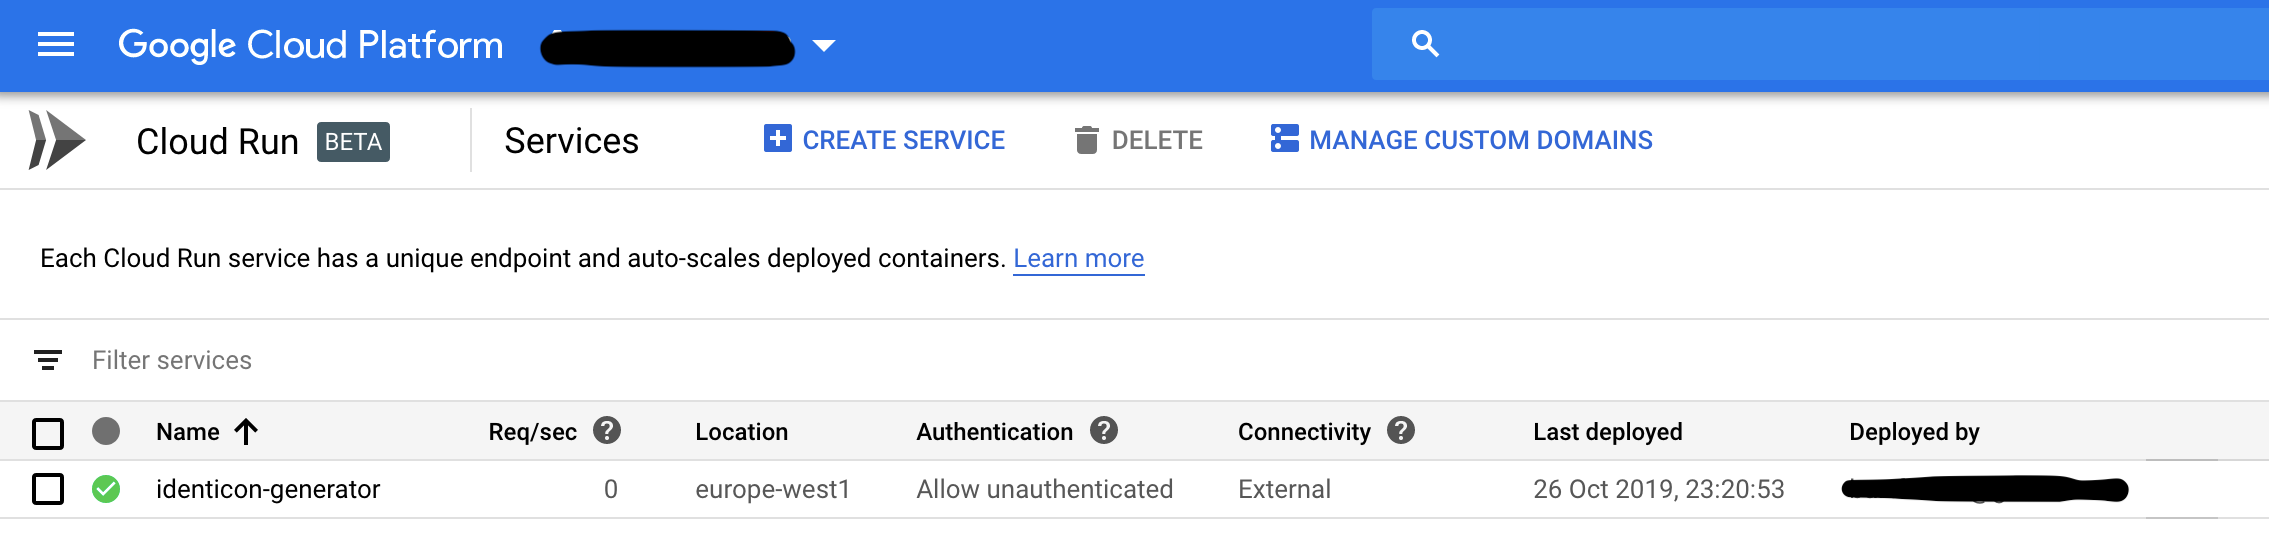
You can now test your cloud function by going to the url which cloud run provides to us. My identicon generator is running on https://identicon-generator-ziolee7x5a-ew.a.run.app/identicon/generate?name=super+cool. You can test it out with various inputs, the first boot can be a bit slow because the container is having a cold start but subsequent requests will be very quick because there is no need for a cold start.
Conclusion
Deploying web applications with cloud run is very easy. It is as simple as defining a Dockerfile and publishing the image to google cloud. It removes the burden to maintain any infrastructure and you only pay for the resources it uses. Scaling is done automatically and in combination with hosted databases like cloud sql you have a fully managed solution which is very easy to maintain and also very scalable.
The benefits of using a service like cloud run is that your local environment is not depending on any kind of serverless framework or library, it is just a regular go application which you can test and run in the same way as you're used to.
Cloud run is still in beta and will hopefully soon be covered by the SLA and available in more regions. In a later post I will explain how to automate the build process from a git push to a deployment in cloud run.
The full code can be found here
Thanks for reading and happy coding 🚀